Coffee Talk: Pour-Over

There’s a growing trend among craft coffee lovers… the pour-over brew. This small-batch method is great for tastings (or “cuppings”), since it makes a small amount of coffee at a time. Additionally, it lets the drinker tweak and adjust variables like amount of coffee grounds, temperature of water, fineness (or coarseness) of grounds, among others. Great for somebody who is really on the quest for the perfect cup.

Pour-Over Coffee

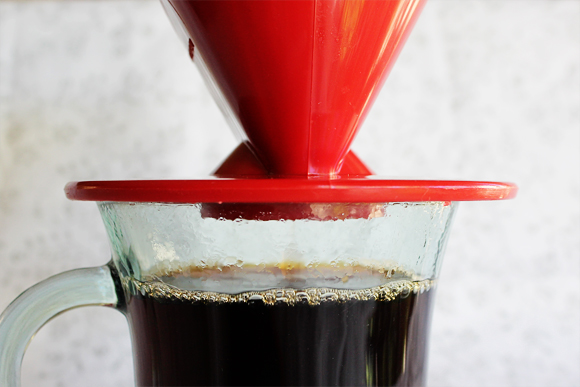
Using a simple cone funnel and a cone filter, I scooped two tablespoons of coffee into the filter. Below, I’m just pouring water right in, but from what I’ve read now… you are supposed to get the filter wet first to prime it (Do as I say; not as I do). Then, pour hot water (I boiled mine then let it “rest” for a minute or so to cool off a bit) into the grounds. Apparently the velocity and speed of water can even affect the final taste. This is why pour-over enthusiasts prefer the control and precision offered by a goose-neck kettle. I keep things simple around here and just used my normal red kettle. :)

Pour-Over Coffee

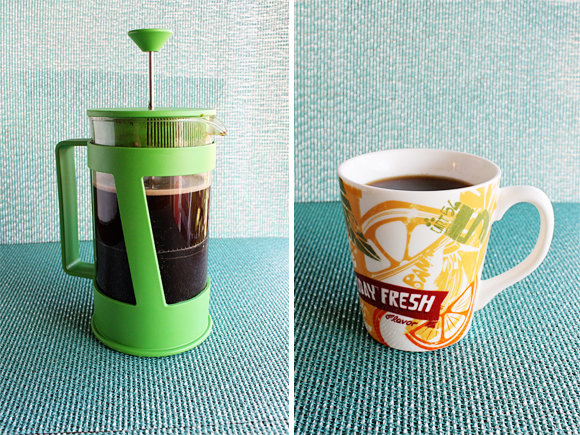
The method I used is for a single cup. For groups, the pretty glass Chemex is a great (and visually appealing) option. Coffee made in the chemex can also be reheated!

Pour-Over Coffee

This post wraps up my Coffee Talk trilogy! I hope you learned something or it has encouraged you to try a new coffee-making method. I certainly had (highly caffeinated) fun researching, experimenting, and writing these posts.

As always, if you have any tips or tricks in relation to pour-overs, or coffee in general, feel free to let me know in the comments! 

Coffee Talk: Bialetti Moka Express

All weekend I had coffee on the brain. I was playing around with a French press (or cafetiere, as friends abroad call it, according to comments) and a pour over (post coming on Wednesday), but I would be remiss if I didn’t include this little guy in my “Coffee Talk” roundup.

Moka Express

My Bialetti is a trusty little espresso maker. Supposedly, nine out of ten homes in Italy have one of these handy little devices. Sounds like a lofty claim, but I don’t see why it couldn’t be true! Compact and easy to store, it’s a easy way to make espresso. Now, being educated on true espresso as I am (I have to know so I can sell espresso machines at work) I wouldn’t call this a true espresso maker… the water is not forced through the grounds at quite a high enough pressure to get the rich, light-brown “crema” of a real espresso shot. However, it is much richer and stronger than a regular cup of coffee. Served in small portions, it goes well with a scoop of sugar or dab of milk.

To use the aluminum Bialetti is simple–fill the bottom chamber with water, the center funnel with grounds, and screw the pieces together. Sit on a burner–electric and gas will both work… you could even take it camping and set it above a fire. The water will boil in the bottom half forcing water and vapor up through the grounds and into the upper chamber.

Moka Express

I used a little battery-powered frother to whip up some warm milk and poured my epsresso into it for a yummy latte. You could even sprinkle the foam with cinnamon and brown sugar!

Oh yes, and red is my accent color of the week, thanks to upcoming Valentine’s Day! Is anyone else’s head spinning with Chinese New Year, Mardi Gras, and Valentine’s Day so close together?? 

Coffee Talk: French Press

A few years ago, I heard about French press coffee, and some friends made some for me–it was strong, but I didn’t really notice anything that set it apart from normal drip coffee. Last week when I visited Dark Horse coffee, I had my second experience with French Press and it was amazing. I mentioned in last Friday’s post that it was the best cup of coffee I ever had. It made me determined to try French press at home! The stars aligned when a neighbor in our complex who works for Starbucks hooked us up with a partial bag of limited-edition coffee (Casi Cielo). It was ground specifically for French press (which means the grounds are coarser) so he also lent us his press so we could make it properly.

French Press

Learning to do French press is hard! We should have looked up instructions online–it would have saved us a lot of time (and coffee grounds!) if I had proceed with some sort of guidance. Let me explain: when I make coffee in my Mr. Coffee, I use more than one tablespoon scoop for each cup of coffee I make. For example, if I fill it up to the “4” line, I use 4.5 or 5 tablespoons of coffee. With a French press you do NOT need to do this! My first go-around I used 8 scoops and the end result was like MUD! It was undrinkable. Since the grounds steep in the boiling water, more like tea would do, the coffee is much stronger and you don’t need to use as much. We dumped the first batch and made the second batch with 4 scoops. Much better. Which brings me to my next point–I think this is much more economical! Where I would use 6-8 scoops in my Mr Coffee, I only used 4 in the Bodum and it was much stronger, more robust, and complex.

French Press

So, as far as I’ve figured it out… here is how to make French press coffee.

  • Boil water in a kettle.
  • Scoop your grounds into the glass.
  • (edited to update–let water sit for a moment so it is not actively boiling. too hot will distort the flavor!)
  • Add water to the grounds, give a little stir.
  • Let them sit for about 4 minutes
  • Then press the plunger down–the screen will separate the grounds from the coffee.
  • Enjoy!

Fellow coffee fiends, feel free to weigh in with any recommendations or funny stories in the comments! As a French press newbie, I’m sure I have a lot to learn from you.

I have a fun non-coffee-related post planned for tomorrow, but come back on Monday for a continuation of my coffee adventures… my experience with a pour-over!