Wallpapered!

As I may have mentioned in my last post, my bedroom has never really quite come into its own, design-wise, even as the other areas in the house have begun to seem more or less “finished.” This is a common issue with bedrooms, because these rooms are private and do not need to be decorated to entertain the general public. Funny how things work out; I had planned a bedroom overhaul for 2020 before COVID hit, but once the stay-home order came out, it became clear there would never be a better time to show my home some TLC.

Check out my wallpaper journey – and check the bottom for a 25% off coupon code!

For a refresher on how the room started, and a piece-by-piece breakdown of the mood board, check out my last post.

How-to

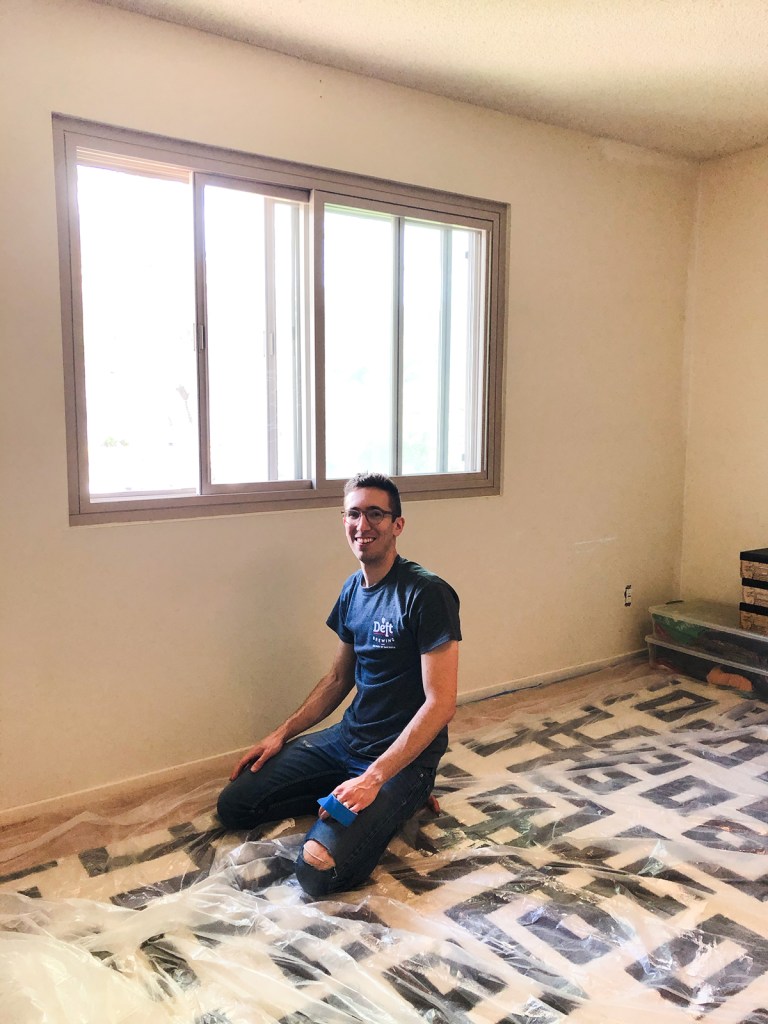
This was my first time tackling wallpaper… ever. I’m happy to report that the process proved to be much easier than I expected! The kit I ordered from Photowall included everything I needed except for a bucket and paint roller, which I already had on hand.

In addition to reading all the Photowall instructions, I watched a number of youtube videos before beginning, and I found this one by Spencer Colgan to be the most helpful; it’s where I got the idea for the paint roller. In fact, his youtube channel has tons of tutorials on hanging all different kinds of wallpaper. Another resource I drew on was Young House Love. In their post, they hang peel-and-stick wallpaper, but many of the principles are the same.

Considering the resources I listed in the paragraph above, I feel like diving into a detailed how-to on this blog would not be the best use of my time or yours. Check Spencer’s video and the Young House Love post referenced, they have explained everything very clearly. I will share some of the things I learned, however, because when you watch a video made by an expert it seems foolproof, but there was a bit of a learning curve.

Had the room cleared and the plastic laid down… ready to start!

Learn from my mistakes:

Here are a few things that I had to adapt to along the way.

First, use more glue than you think. The wallpaper glue is pretty thin and runny; we ended up rolling the wall with glue and brushing it onto the back of the wallpaper (especially the edges) to make sure we got enough.

Second, measure both the right and left corner, floor-to-ceiling. We began on the left corner of the wall, following the instructions. However, by the time we reached halfway across the room, we noticed that the ceiling had actually been slanting up the whole time and we were on track to have over an inch of wall with no paper – obviously we wanted the pattern to match up! Luckily, I had chosen a fairly forgiving pattern and the window in the center of the room made it easy to do a subtle “reset.” The slightly mismatched pattern is obscured by the bed. I should have begun the paper with a little extra overflow on top… there was plenty of extra at the bottom.

Third, don’t be afraid to squeeze glue out of the seams to get a good seal – you may have noticed on the youtube video Spencer had a wet towel on his shoulder. THIS IS KEY! Have your wet towel handy especially if you hate having sticky hands like me… because this is a pretty messy process.

Progress

At the end of the day, it was thrilling to see the dramatic change. Many people say that painting a room a light color will make the room seem bigger, but what I found is that the exciting wallpaper actually makes the feature wall seem larger.

Active time with the wallpaper only took about 3 hours to do this feature wall. Clearing out the room and putting it back together took longer! If you want more step-by-step progress footage, check my Instagram highlight which has stills and video from the weekend I tackled this project.

The Finished Wall!

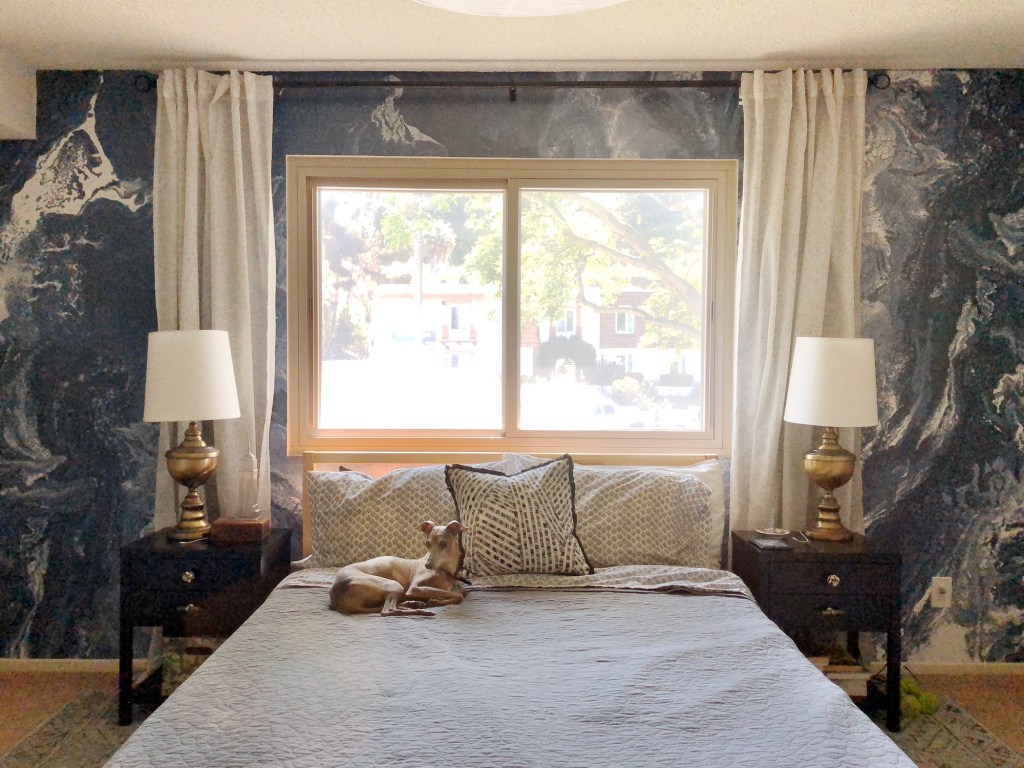
wallpaper / rug (similar) / bed / bedside tables (similar)
lamps (similar) / sheetsquilt (similar)

Voila! I’m very happy with the result. It reminds me of a hotel – which is pretty much the ultimate goal for me since I love staying in boutique hotels.

You’ll notice a few changes in the before/after, but aside from the wallpaper, everything you see here was already owned. I love swapping things from room to room for a free mix-up. You might see I traded out the rug. The black and white geometric rug from the mood board did look good with the wallpaper, but this gray geometric rug was a Black Friday purchase that I never really felt went with the living room. Swapping the rugs brought perfect harmony to both rooms. The final touch this room needs is a solar shade for the window- as you can see above, this room gets a lot of light first thing in the morning. I haven’t hung any art up on the paper yet because I think the wall is art now.

Now that I know how easy the paper is to put up, I’m brainstorming other areas in my home where it can be used. I would love to know if you would ever tackle wallpaper in your home. What color or design would you pick? A large-scale mural on a feature wall like me? Or a repeating pattern, perhaps doing the whole room for a more traditional approach? Photowall has thousands of options, including the option to upload your own photo, so head over there to find inspiration.

I’m so excited to let you know that Photowall has extended a coupon to all myfriendstaci.com readers, offering 25% off through September 25, 2020. Enter myfriendstaci25 at checkout!

I love to hear from you. Please add your thoughts or questions in the comments!

I was not paid to write the post but I was gifted product from Photowall to bring my vision to life.

Advertisement

Master Bedroom Refresh

Since moving into this condo in 2014, my master bedroom has undergone small and very incremental changes. At first, we didn’t even have a headboard and were just working with a metal bed frame. I’m so picky—I finally narrowed down my options and ended up with one of IKEA’s cheapest options, TARVA. Totally cool with that!

Someday, if I want to change up the look, this raw pine can easily be painted or stained. For now, I am totally digging the honest, Scandinavian look of untreated wood. My other preferred bed option was the very popular CB2 Alchemy bed in either black or gold.

For our dresser, I am still totally loving this IKEA dresser, purchased way back in 2012. They don’t make it any more, which is a real shame because I love the generously sized drawers and straightforward Parsons-like lines.

Here’s a 6-year old photo of the dresser featuring a cute young Mosey with very little white on his snout :)

Other than that, the room honestly has a lot of furniture in it. The two pieces acting as bedside tables are actually emptier than you’d think. We are using our old bedside tables, pushed together, as a TV stand across from the foot of the bed. The awesome Wurlitzer stage piano is in here too—I don’t really have a better spot for it and I cannot bear to get rid of it. Lastly, storage is kind of an issue in the condo so I’ve got a stacked pair of IKEA pine cabinets in the corner that look like an armoire but are actually just holding a ton of random things.

Before

To be honest, this “before” has a lot going for it. I love the look of white walls and pine together. It’s very Scandinavian feeling, and the guitar on the wall adds some fun to the room. But there isn’t really a focal point or dramatic moment in here, which my other rooms have.

I got the opportunity to work with a wallpaper company and the timing couldn’t be more perfect. Photowall has partnered with me on a wall mural and it’s going to totally change the vibe of the whole room. Here’s the inspiration board, most of the things on here are stand-ins for items that I already own.

wallpaper / rug / bed / bedside tables / console table / lamps / quilt

I can’t wait to share the afters with you!

Summer Forecast

Okay, so, my home isn’t new to me, but I have been putting a lot of thought into designing my spaces better. I feel that we’ve finally gotten settled, gotten to know our home, and really know what works for us. Now the fun part comes. Getting each room tweaked just so, and realizing our condo’s full potential. We are traveling a little bit in May, but in June and July I think we are going to work on home stuff a lot more than we have in the last year or so.

Living Room: The living room is humming along. We are working on a wood paneling update that I’ll share more about in a week or two. We are going black and white inspired by the interior design firm Commune’s work at the Ace Hotel LA. Here is a sneak peek and a little inspiration I am working from.

living room inspiration.jpg

Bedroom: The paneling has been going so well in the living room, I think we have enough leftover to do paneling in the bedroom too. I think the recurring feature will connect the rooms, but for color I am still deciding between matching the black from the living room or going with a color.

bedroom inspiration.jpg

All of this exciting redecorating on the horizon has got me thinking back to moving into our place for the first time. Making a neutral space exciting takes a little bit of skill, a little bit of luck (if you’re a bargain/thrift shopper like me) and a dose of color. I’m finally ready for phase two of decorating, but phase one is a challenge for a lot of people. I brainstormed with Casper to come up with some essentials to make a new house feel like home.

Staci_home_essentials

Rug: Rugs are great because you can move them from room to room and house to house. They are a good investment and can cover up less than desirable linoleum or blah carpet.

Artwork: Like rugs above, artwork can be sentimental and move from home to home. Putting art up on the wall instantly transforms a room from a plain box into a place with warmth and dimension.

New Mattress and Pillows: Every room can do with new throw pillows, and moving is a good opportunity to trade in for a new mattress, too. If your mattress is doing okay, it’s still a good idea to get new bed pillows because… do you even remember the last time you got new bed pillows? I mean… you could get your dog a new bed too. Mosey asked me to mention that.

Paint: Confession, even when I was a renter I took the liberty of painting my space. Something about picking out the color you want to surround yourself with is liberating. We recently painted our living room from beige to white, an almost imperceptible change but the room just feels “right” now.

Lighting: I switched out my dining room light and have felt like a rockstar ever since. I think this usurps painting as the act that truly claims a space as your own. If you invest in lighting (it ain’t cheap) and put it up without zapping yourself… your house has truly become home.

Tool Kit: Trying to assemble furniture or switch out finishes can be frustrating without the right tools. I got this IKEA tool kit when I moved into my first apartment in college. I have used it countless times. It has just about anything you need to do odd jobs around the house—I can’t recommend it enough and I think everybody should have one tucked in their bottom kitchen drawer, like we do.

What do you think takes your living space from “house to home?” Having friends over is an instant fix–they call it housewarming for a reason. Baking something delicious and filling the home with the scent of that is another great idea. Share your move-in traditions, or must-haves, or best housewarming gifts in the comments!

Casper provided me with the infographic, but this is not a sponsored post.