Storage Wars

To be 100% honest, I have never seen the show that this post is named after. Storage does seem to be a war a lot of the time, though. “Me vs. My Stuff.” Sometimes I win, sometimes the stuff wins…

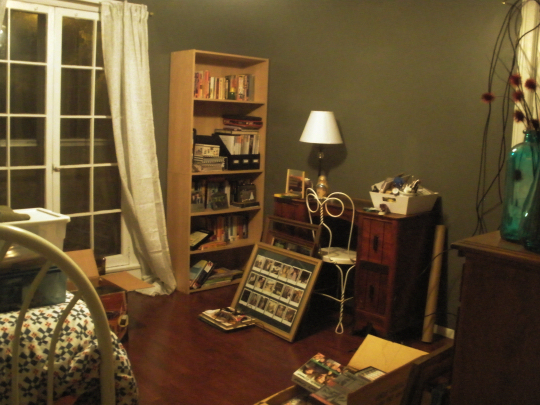
This week, I have been doing a lot of thinking about storage. Not for myself, because the storage situation in our current house is a nightmare (No idea what we’d do without the basement as a catch-all), but because an old friend of mine asked for some advice on reorganizing her closet.

Armed with measurements, pictures, and two “rules” to keep in mind: 1) consider a limited budget, and 2) no plastic bins (due to smell of off-gassing VOCs and environmental concerns) I proceeded to to research online for smart, well-designed storage options to maximize a space that, to be honest, was pretty much already “at capacity.”

Color: I went with storage pieces in a coordinating color palette: light wood tones and white. Lots of storage options come in these colors, so it’s an easy theme to go with, and to me it’s important that visually the space looks clean and crisp, especially when storing a lot of different items–it is easy to get overwhelmed by competing colors, patterns, and textures, and having some continuity can help tame the chaos.

Click the image below to be taken to my Storage Pinterest board where you can access each item at it’s respective store.

Items, in what I consider order of importance:

  1. One of my college roommates (who had a TON of clothes) got a drop-down secondary closet rod. It literally doubles the number of normal-length shirts one can hang up. The one I have selected here just hangs from the existing rod, meaning that there is no permanent installation! With an adustable length, it can accomodate the right number of shirts, and still have some space left on the high bar for dresses and other long items.
  2. Shelving: Storing items in stacked boxes is fine, if you don’t need to access the items in the bottom ones! Utilizing a shelving system with pull-out bins helps make items accessible, yet concealed. I especially like this system for shoes: a few pairs of shoes can go in each bin sorted by color or level of formality, and even men’s shoes should be able to fit. Other things like “tech junk” that is rarely used but seems like a good thing to keep around, scarves or other soft accessories. I do not own an EXPEDIT but I truly think that the repetition of the square shape can help any craziness seem a bit more orderly. Plus, with the open back, the large versions can even “float” in the middle of a room, defining space and providing storage at the same time.
  3. Laundry bin: Purchasing a large, durable and attractive laundry bin makes it possible to tuck it in the corner of a room and gain some real estate in the closet. Also, if you’re like me, a laundry bin stored in the closet will overflow onto the floor and the carpet ends up 100% obscured by dirty clothes. Putting it out in the open is a simple reminder to do laundry once it’s full (at least, this works for me). Here’s a cheaper DIY option for those with less coin, but more time on their hands.
  4. Hanging garment bags. I would LOVE to get one of these for myself to keep my out-of-season coats or special-occasion dresses in. Things have a tendency to get dusty, and I don’t want to have to sift through my not-frequently-worn items to make sure I didn’t tuck something in the back of the closet. I don’t want a ton of these cluttering up my closet, but corralling these particular items in a specific “pod” would be super-organized and super-functional!
  5. Shelf organizers. I can see these being a game-changer for anyone trying to organize multiple items on the shelf. Books, purses, other boxes… keep things from cascading into an empty space when one item is removed temporarily.

Stay tuned later in the week for some more organization goodness, featuring many of the items I blogged about today!

This Week’s Challenge: Clean out your dresser

Friday, in a flurry of productivity, I undertook a task that is sometimes intimidating, but I am so glad I tackled it.

I took everything out of my side of the dresser (three drawers), dumped it on the bed, and put everything back in neatly.  I did this because I’d gotten really lazy putting away clean clothes (isn’t that the worst part of laundry?) and my pajamas had slowly taken up major chunks of all three drawers! How do I have so many pajamas? Can’t bring myself to throw away all of my old college/high school event shirts, I guess…

The pictures are a little small but you can tell that stuff was basically going every which way. In the top drawer is a gallon-sized Ziploc trying to hold all my my tights/pantyhose and failing. Pajamas in all three drawers. Basically a nightmare.

After, socks and underwear corralled into their respective shoeboxes (top drawer), and pajamas and camisoles neatly folded and tucked into rows. This is my favorite way to store shirts in a drawer because I can easily see them all and pull out the one I want without disturbing the rest (stacks, unfortunately, are the worst). The middle drawer houses cardigans and other sweaters. I read somewhere that you should never hang up sweaters because it’ll get deformed shoulders from hanging up for a long period of time. Here I am, making an effort. Lastly, the bottom drawer–the pants drawer–is the new home for rolled-up tights and pantyhose, in a handy amazon.com box. I figure those items fall into the “leg” category (with pants) and the bottom drawer had the most available real estate.

There you have it! My incredibly riveting before and after.

My challenge to you is to do this sometime this week! It was a pretty quick fix… that is, it was about an hour from “Before” to “After.”

Five Days… With Pictures!!

Despite a really, really awful week at work last week, progress inside the house is getting made.

  • Put up the Christmas tree
  • Do “something else” with the fireplace (paint or replace items inside)
  • Purchase a rug pad for diamond jute rug in living room
  • Purchase a rug pad for zebra rug in guest room
  • Clean off the guest bed so it’s sleep-able
  • Generally make guest room ready for guests
  • Do a little more festive Christmas decorating
  • Decide yes or no on outdoor Christmas lights
  • Get a shower curtain (right now we just have a liner)
  • Curtain clips for the dining room
  • Hang higher curtain rod in guest room
  • Do a little kitchen re-organizing
  • Buy groceries (so they don’t starve while they’re here! Our fridge is usually a big cold empty box…)
  • Liven up the white wasteland that is the hallway (halfway there!)
  • Hang pictures in guest room and master bedroom
  • Frost window on kitchen door and in bathroom (I want to try this)
  • Paint front-door dresser and move cold-weather accessories into its drawers

This weekend saw a few minor updates, we are still working on digging out the guest bedroom… we’re quite close, actually and I’ll be able to post pictures sometime this week! I crossed off a few less-urgent items, even after all my prioritizing by making things bold last week. Isn’t that always how it goes? We picked up a couple of curtain rods for the guest room and hung them–they look magnificent :) Elsewhere in the house we have dark bronze but since the paint is so dark in the guestroom we decided to go with brushed nickel and I really love it.

My Christmas decorating is officially done, except for a project I have in the works to use for the I Heard A Lion Christmas party which will be at my house this year. I’m not going to start working on it until my parents have come and gone, though, so no more hints on that :) Here’s what I have so far…

We set the tree up the weekend before Thanksgiving (heresy, I know) since it was our last free weekend until the New Year, more or less. Busy busy!!

Saturday we swung by Hobby Lobby and got in a knock-down drag-out brawl (okay, not really) with the middle aged ladies in the faux greenery aisle but came out victorious with some more-or-less matching “pine branches” which were easily slipped behind the big photo frame and instantly gave the mantel the little “something” it had been missing.

Oh, and here are the curtain clips we bought a few weeks ago. I like the interest they give at the top–before the wall of curtains was a bit too “heavy,” I think. Since adding them, the curtains have the opposite problem than before (when they were too short), they drag on the ground a little more than I wanted them to. However, Doug suspects they’re helping avert a chilly draft so for now they’ll pool on the ground slightly. The nice thing about these rings is that it makes the curtains wayyyyy easier to open and close. Before they were getting hung up on the parts where the curtain rod joins together. Now they slide freely. So that’s good :)

So, looking at these photos gives me something else to add to my to-do list… steam curtains? Man they’re all really wrinkly!