The Living & Dining Room

I know, I know, I know. I have been promising these photos forever. The problem with living in an open layout like mine is that it is almost impossible to get the whole place clean for good photos. Well, we’re all in luck because last Thursday was the apartment’s annual inspection, whatever that means, and we made sure the whole place was spic and span. I’m finally ready to reveal the main living space of the 825 sq. ft. apartment we affectionately call the Shoebox-by-the-Bay (a little ripoff of the community Cardiff-by-the-Sea… gotta love the chain of hyphens).

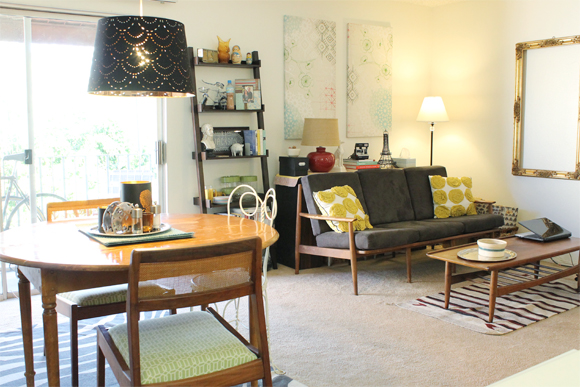
It sure is a learning curve going from our old place where we had to actually remove doors when we moved in, to a place that has three doors, total, including the front door. What an open layout! Here is the living and dining area from the kitchen. I love this shot:

Living and Dining Area

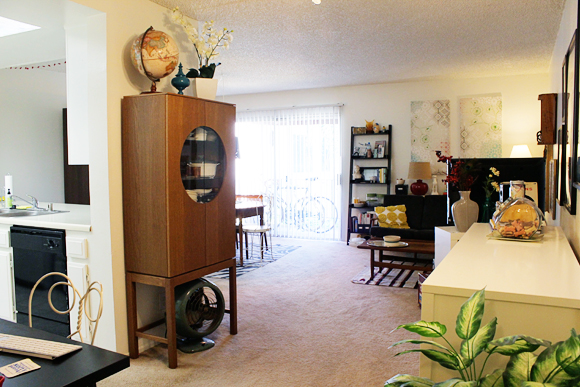
And here is a shot from the entry. Does this look like a bad real estate photo? This place is kind of dim and so awkward to shoot. I hope I am communicating the idea of the space, though!

Living and Dining Area

One of my goals with the blog and with this current apartment in particular is to show how living within constraints–decorating rules dictated by a landlord or management company, financial restraints due to the recession or just starting out on one’s own, for two examples–does not have to prevent a person from having a home with unique style.

Sometimes I get disheartened by so many blogs that I read. It’s not the blogs themselves that are disheartening–the opposite is true! They are so inspiring but I get frustrated that I can’t buy my own fixer-upper home, or redo my kitchen, or build a wall full of built-ins to make my home one-of-a-kind. I would say that there are at least fifty units exactly like mine in my complex, however I have made the place comfortable and infused it with personality. All without a kitchen remodel, or even anything as simple as painting a wall.

At the end of the day, I want to inspire my friends and readers who might be living in a huge complex like mine, or at home with their parents, or with some roommates, or simply on a strict budget, to take what they have, renew, refresh, or recycle it, and to steal furniture off the side of the street like there’s no tomorrow. Wink.

Enough of my soapbox. A few more photos…

Living and Dining Area

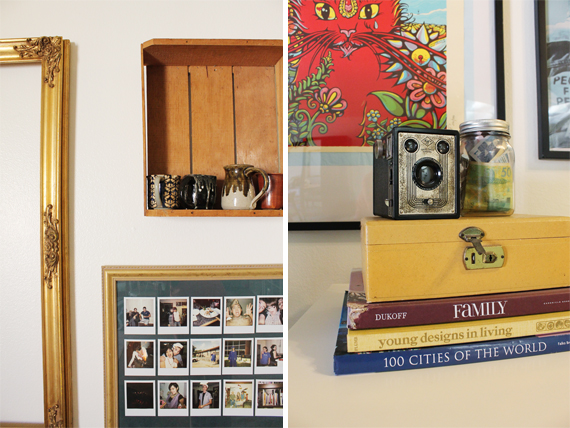
The purple book above is the ONLY book Mosey has ever chewed on–and it was right when we got him (he was 7 months old). It’s unfortunate, though, because Family is a really unique photography book!

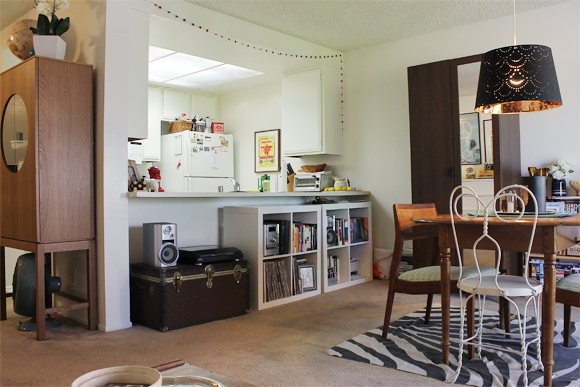
One of my favorite things about the place is the gigantic pass-through that connects the kitchen to the rest of the space. What would otherwise be a cramped galley kitchen seems much more spacious. This is what one sees, sitting on the couch:

Living and Dining Area

Here’s our TV situation. Nope, we still don’t have a proper media unit. I’ve blogged about this before. I do have some construction plans rolling around in my brain, though, so my freshly-retired dad might be enlisted to help me build a little something-something soon. We’ll see what happens. Also featured (right photo) the blogger’s nightmare trifecta: popcorn ceiling, boob light, and ceiling fan. I sure was grateful for that fan during hot, hot move-in day, though.

Living and Dining Area

Hope you liked the little tour of 75% of our apartment! I’ve grouped some photos onto a revamped home tour page, but it’s still a work in progress over there as far as details go.

I hope my little soapbox interlude up there inspired you to make the most of wherever you are living!

Questions? Comments? I see that hand raised in the back! 

Coffee Talk: Pour-Over

There’s a growing trend among craft coffee lovers… the pour-over brew. This small-batch method is great for tastings (or “cuppings”), since it makes a small amount of coffee at a time. Additionally, it lets the drinker tweak and adjust variables like amount of coffee grounds, temperature of water, fineness (or coarseness) of grounds, among others. Great for somebody who is really on the quest for the perfect cup.

Pour-Over Coffee

Using a simple cone funnel and a cone filter, I scooped two tablespoons of coffee into the filter. Below, I’m just pouring water right in, but from what I’ve read now… you are supposed to get the filter wet first to prime it (Do as I say; not as I do). Then, pour hot water (I boiled mine then let it “rest” for a minute or so to cool off a bit) into the grounds. Apparently the velocity and speed of water can even affect the final taste. This is why pour-over enthusiasts prefer the control and precision offered by a goose-neck kettle. I keep things simple around here and just used my normal red kettle. :)

Pour-Over Coffee

The method I used is for a single cup. For groups, the pretty glass Chemex is a great (and visually appealing) option. Coffee made in the chemex can also be reheated!

Pour-Over Coffee

This post wraps up my Coffee Talk trilogy! I hope you learned something or it has encouraged you to try a new coffee-making method. I certainly had (highly caffeinated) fun researching, experimenting, and writing these posts.

As always, if you have any tips or tricks in relation to pour-overs, or coffee in general, feel free to let me know in the comments! 

Coffee Talk: Bialetti Moka Express

All weekend I had coffee on the brain. I was playing around with a French press (or cafetiere, as friends abroad call it, according to comments) and a pour over (post coming on Wednesday), but I would be remiss if I didn’t include this little guy in my “Coffee Talk” roundup.

Moka Express

My Bialetti is a trusty little espresso maker. Supposedly, nine out of ten homes in Italy have one of these handy little devices. Sounds like a lofty claim, but I don’t see why it couldn’t be true! Compact and easy to store, it’s a easy way to make espresso. Now, being educated on true espresso as I am (I have to know so I can sell espresso machines at work) I wouldn’t call this a true espresso maker… the water is not forced through the grounds at quite a high enough pressure to get the rich, light-brown “crema” of a real espresso shot. However, it is much richer and stronger than a regular cup of coffee. Served in small portions, it goes well with a scoop of sugar or dab of milk.

To use the aluminum Bialetti is simple–fill the bottom chamber with water, the center funnel with grounds, and screw the pieces together. Sit on a burner–electric and gas will both work… you could even take it camping and set it above a fire. The water will boil in the bottom half forcing water and vapor up through the grounds and into the upper chamber.

Moka Express

I used a little battery-powered frother to whip up some warm milk and poured my epsresso into it for a yummy latte. You could even sprinkle the foam with cinnamon and brown sugar!

Oh yes, and red is my accent color of the week, thanks to upcoming Valentine’s Day! Is anyone else’s head spinning with Chinese New Year, Mardi Gras, and Valentine’s Day so close together??