Coffee Talk Epilogue: Nespresso

Last February I shared a three-part series detailing my experiments with at-home coffee making… without using a standard Mr. Coffee. If you missed them, make sure to check out my tips and tricks for a French Press, Mokapot, and Pour-Over!

Have you heard of Nespresso? It’s a capsule-based espresso system. Their commercials here in the US feature Penelope Cruz, but internationally George Clooney is their spokesman.

(Bonus points if you recognized “Nora” from How I Met Your Mother)

I have a quick epilogue to add to my coffee conversation! My kitchen has a new little addition to it. I sell Nespresso machines at work and well… you can see, I’ve sold myself on it!

Nespresso

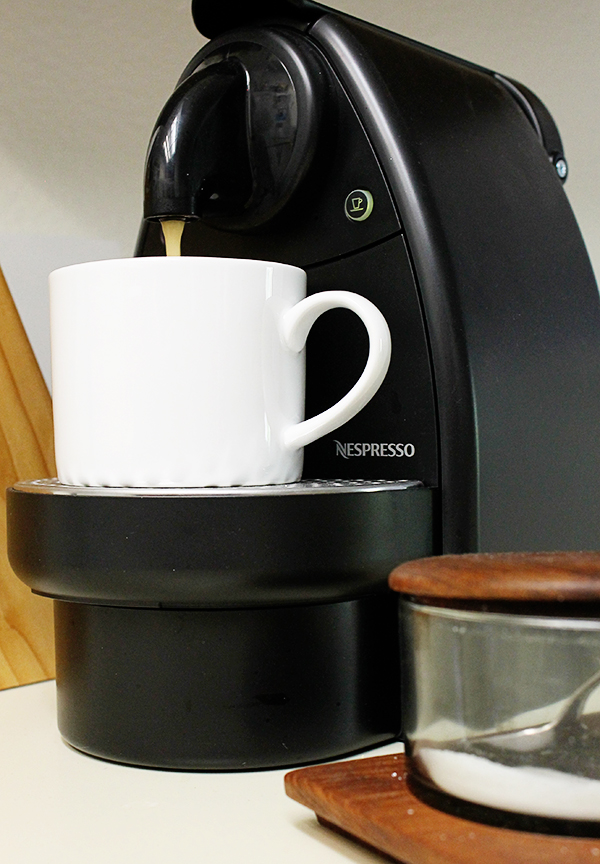
My machine is the budget-priced Essenza, but my favorite machine is the cute and user-friendly Pixie

Espresso is a different animal than coffee is: its flavor comes from water forced through a tightly packed shot at a high temperature and high pressure. That’s why the flavor is so intense and most espresso shots are only 1 to 2 ounces. When you order a latte at Starbucks, it’s normally two small shots added to steamed milk. Think–you’re really paying $3+ for four ounces of coffee!

Nothing against grabbing a latte out with friends–I love meeting up at a coffee shop with people. It’s grabbing a quick latte every day before work that becomes a big-time money suck. Enter Nespresso: the machines heat up in no time and the flavor options they have available are really delicious… and for 60 cents a shot–it’s much faster and cheaper than going through the Starbucks drive through on the daily.

Nespresso

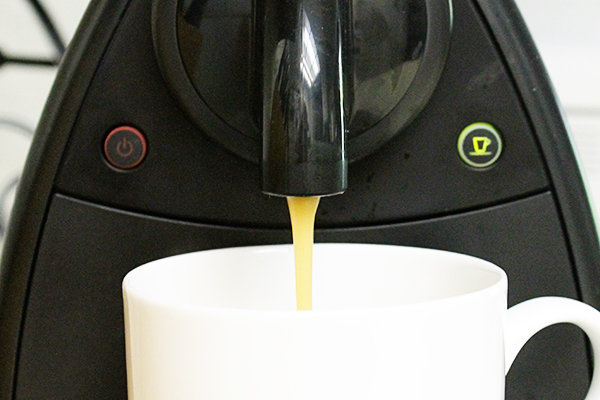
When I have a lot of time in the morning, or a lot of writing to do and want a massive carafe of coffee that will last for hours, I still default to “normal” style coffee made in my French Press (which I’m getting better and better at making!) When time is of the essence and I want a yummy caffeine fix, my routine is this: prepare my cup with a small spoonful of sugar. I run the capsule through my Nespresso and then finish the cup off with milk. This process takes roughy two minutes–120 seconds!

I’m not getting paid or perked by Nespresso to write this post–Just sharing the technology that’s out there with you all in case you hadn’t heard of these machines and were suffering from paying too much for specialty coffee drinks every day.

Wedding Registry Tips

Summer is here, and with it Wedding Season. My sister’s getting married, and a flock of couples on my Facebook feed have just gotten engaged! I decided to draw on my knowledge and experience of registering and helping others register to share a few tips.

In-store vs. online

I always, always, always, recommend registering in-store first. It’s hard to know what a product is really like until you see it in person. Take the time to hold the flatware in your hand, hold up the towels with an accent color–picture how these items will be in real life. Feel the bedding and make sure it’s soft enough–or does it seem cheap? There’s nothing worse than receiving a registry item that falls apart less than six months later. What a waste of your time and your friends’ money! That said, it’s very convenient to add more items online as those you registered for get discontinued or if the date approaches and many items have already been purchased, especially if you have seen the items in-person ahead of time.

Wedding Registry Tips

Items: 1, 2, 3

Fill the Home

If you’ve lived on your own for a while, there is a good chance you have enough “stuff” to fill up a house. Use this opportunity to fill in the gaps–to replace the ratty towels you used for 4 years in college, or the toaster that still technically works, but you suspect will cause an electrical fire any day now, for example. Register for a few nicer pieces of cookware, to replace the $5 skillet you got from IKEA a while ago. If you’re just starting out, this is a good time to get the basics. Registering at somewhere like Target is great for someone who needs everything, just know that many items will wear out much more quickly than their higher-end counterparts, and it will be up to you to replace things. (Example: I am approaching the 3-year mark and have begun replacing the cookware I received from my Target registry, as it is wearing out).

Wedding Registry Tips

Items: 1, 2, 3 

“Forever” items

If you’re getting married at an early age and have a whole home to fill, it’s tempting to register for quantity over quality. However, there are gift-givers who truly want to give you an item that will last forever. Don’t be afraid to include a few “forever” items in your registry… for some people, fine china (around $150 per place setting) is still a priority. For others, a high-end juicer or Vitamix ($650) is something they would use daily as part of a healthy lifestyle. Remember that it’s common for people to pitch in together to get a big-ticket item! Don’t worry about looking greedy–just mix in a few high-end items with a majority of things at an accessible price-point. Remember, this is a big life event and many people want their gift to reflect that.

Sometimes it’s hard to talk about registries without feeling greedy or like you’re a part of the Wedding Industrial Complex. I want to remind you that people will attend your wedding and most will feel led to bring a gift. This is because they love you and want to celebrate the milestone with you! Take all “wedding registry must-have” lists with a grain of salt and register for what you will actually use. If you don’t bake much, don’t feel pressured to add a Kitchenaid Stand Mixer just because all the kitchens in magazines have one. Be true to yourself!

Your turn: Anything to add? Leave a comment!

DIY Graduation Money Lei

Last weekend I had the privilege of heading up to LA to celebrate my sister’s great accomplishment–graduating from college! She even graduated on time, more than I can say for myself!

Something that’s really common in Southern California is that graduates often receive Hawaiian leis to wear with their robes. Usually they are real flowers, although I have seen artificial ones, candy leis, and money leis! Instead of buying a lei I decided to make one myself combining candy and money.

While I was working on this project, Doug asked if this was a common tradition. I realized that in all the graduations I’ve attended in Kansas– I never saw a grad receive a lei! Usually if they get flowers, it’s in a bouquet. I guess this gift has become more widespread in California because there are a lot of Hawaiians and other Pacific Islanders living here. I’ve seen leis given to grads by family and friends at every graduation I’ve been to here in CA, and I love this tradition!

Money Lei Supplies

To make this product, I used two long chains of candy, tape, money, and ribbon. If you don’t have access to cute Japanese candy like I had, you can make a candy chain with any kind of candy by following this video. San Diego locals: I got the candy chains at Marukai Market on Convoy St.

To make your own–here are the steps!

  • I taped the chains of candy together using packing tape to make them into a necklace.
  • Cut the ribbon into lengths you feel comfortable tying into small, tight bows. My pieces of ribbon were about ten inches long.
  • I decided what color pattern I would tie my bows in–this is an extra step since I ran out of burgundy ribbon… I had to sub in some raffia in a couple of places. I ended up going with two burgundies, then one raffia (repeated x 4). Making a pattern looks really nice though, and you could use school colors!
  • I double-knotted the ribbon between candy pieces first, before adding the money, just to make sure it was tight. I did all of this at once, then it was time to add the money!
  • To make the dollar fans: First, you want to fold all of your bills into a tight accordion.

Dollar Accordion

  • Then, attach this to the lei by tying a bow around the center of the accordion. Make sure the accordion is “standing up” from the candy at a 90-degree angle, and that your bows are very tight and secure!

Money Lei Process

  • Finally, create a fan by opening up the accordion and taping the edges of the money together. The nicer your money is, the nicer the fan will be. Try to get crisp bills!

Money Fan from Back

Money Fan from Front

This project took me a little over an hour, after I had gathered all of my materials. This is my own twist on the regular money lei. If you want to see a “normal” version accompanied by a how-to, check out this video. I used the video as a resource as far as figuring out how to create my dollar fans–I think he uses over $50! Full disclosure: I used $20. Ten 1-dollar bills and two 5-dollar bills, which meant I created 12 fans. You can make a lei with any amount you want!

I know, I know… you’re dying to see the graduate with the finished product!

Steph's Graduation

Congratulations, Stephanie! Your family is so proud of you!