Antique Postcards in the Bathroom

Recently Doug and I were perusing a huge antique mall and spent a little more time than usual in a vendor’s space that had old postcards and photographs from around the world. It was organized really nicely and all 50 states were broken up so we looked at all the Kansas postcards!

For those who attended our wedding, it’s no surprise that we love antique postcards. We had a box of them for people to “write to us” as an alternative to a guestbook.


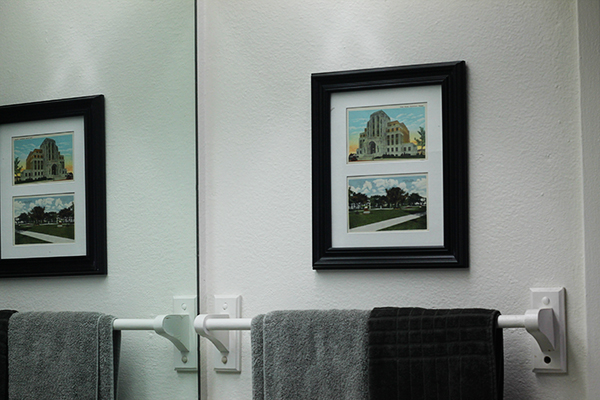
We actually found many postcards from Hutchinson, the town where Doug was born, and even found one from McPherson, where we lived. We nabbed the McPherson one up and Doug picked his favorite Hutchinson locale and I knew exactly what frame they would go in when we got home.

Hutchinson Postcard

McPherson Postcard

We used to take Mosey for long walks in this very park!

The bathroom has proved to be a tricky place to hang art. We have the perfect long and narrow frame for one space (you can see it reflected in the mirror below) but there was an awkward place above the hand towels (look in the reflection in the medicine cabinet–below, right). Psst… These photos were lazily plucked from my Home Tour. ;) 

Bathroom Peek

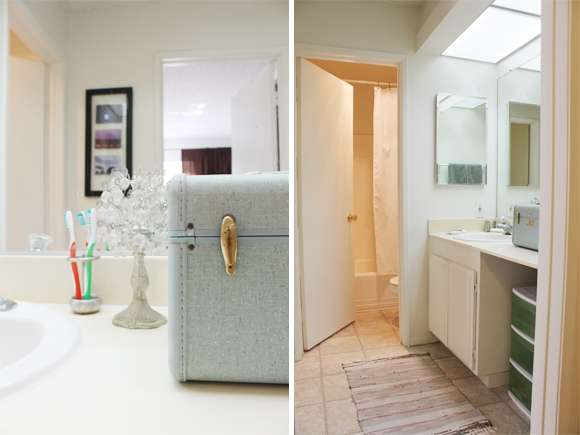
Note: The bathroom area is tiny and full of mirrors–not so easy to shoot! 

Anyway, I reused a very cheap $5 frame I picked up at Wal-Mart years ago. It already came with a mat in it–so this little project was seriously a no-brainer. The small size of the frame looks ok since the towel bar is weirdly high. All in all, it makes me smile to see these reminders of where we’ve been!

Postcards in frame

Postcards in frame

Have you done any inexpensive and sentimental updates lately?
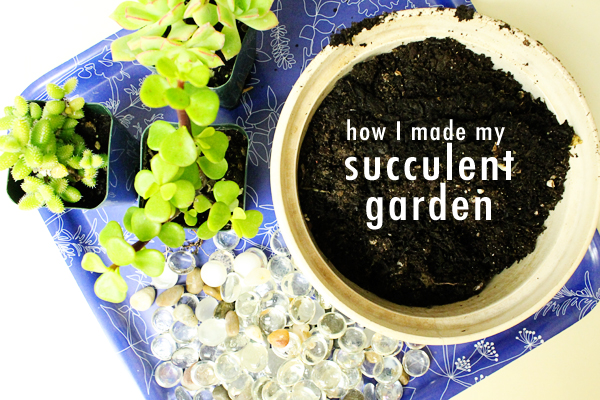
My Little Garden!

The world has gone crazy for succulent gardens and I’m now on the train! I’m so excited to share my little garden today!

succulent garden

First a little shout-out to the market where I got these little cuties for $1 each–the newly opened El Cajon Farmer’s Market! My friend has worked tirelessly to get the market up and running and yesterday was its grand opening! It was a little far for Doug and I to drive, considering we have great farmer’s markets closer to where we live, but we went to check it out to support our friend. We arrived with only $6 but it went a long way! Bought the three succulent cuties you’re about to see, a big bunch of carrots, and some red chard that made a really, really delicious salad after we got home. For those in the area, the market will be open every Thursday afternoon/evening.

Now to the garden!

How I made my succulent gardenSupplies needed:

  • Planting vessel (passed down from a family member)
  • Larger rocks/pebbles (leftover from wedding centerpieces)
  • Potting soil (“borrowed” from a planting bed downstairs)
  • Succulents ($1 each at the farmer’s market)
  • Water
  • [Total cost: $3!]

Planting it was easy peasy and I got to make a little mess in the kitchen.

  1. First I put the larger rocks or pebbles into the bottom. My layer was between 1 and 2 inches thick–this allows some space for water drainage–especially important when the pot doesn’t have a hole in the bottom, like mine.
  2. Then I took the plants out of their plastic planters (tip: squeezing the sides a few times makes it easier to pull them out). I broke up/loosened the root ball a bit and placed them into the vessel.
  3. I then took the potting soil and filled it into the gaps.
  4. I watered lightly but didn’t want to pour too much in since the pot has no drainage hole in the bottom. I’ll be checking out other blogs for tips on keeping these suckers (haha) alive as long as I can!

succulent garden

succulent garden

succulent garden

succulent garden

Ta-da! I’m so excited about my new family member!

Pssst… don’t forget to follow My Friend Staci on Bloglovin’ or Facebook!

Inexpensive Fabric Wall Decor

On Wednesday, Libby asked to know a little bit more about what was going on behind my couch. I am more than happy to oblige!

The fabric panels behind the couch have been with me a long time. When I moved into my first apartment (with a roommate) in 2007, it was 100% furnished with leftovers from my parents’ guest room. Okay, that’s not entirely true. The coffee table was a deeply discounted floor model from the local IKEA. Can you believe I dug up an old photo of my first place?

Old, old, old living room

Isn’t it amazing how far digital camera technology has come in the past 6 years?
This looks like it was taken with a cell phone, but I assure you it was not. 

While at IKEA nabbing a cool coffee table for a cheap price, some yardage of fabric caught our eye in the textiles section. It was so long ago I can’t remember if we grabbed the remainder of the bolt or just a couple of yards. Anyway, this fabric was being discontinued and my mom and I thought the pastel color palette would really go with the blue-and-white striped couch and easy chair. Note: looks like my addiction to sales, discontinued items, and the “as is” section at IKEA is not a new thing! 

Back in the late 80s and/or early 90s, my mom actually stretched canvases as a side job. Or something like that (I was a baby so my memory is, understandably, not crystal clear).

She was happy to revive her skills and help me out by doing these!

Wall Hangings

I like how they can be flipped and rotated to create different designs (compare this arrangement to the first photo in the post).

These beautiful pieces really haven’t had a home until now. They were just what the room needed to balance out the height created by the sliding door and barfy vertical blinds. They help the “living” area look finished.  I was worried that Doug would think they were too feminine, so I didn’t press the issue–but when he saw them he actually really liked them!

This is an awesome, and like I said, inexpensive way to make some large-scale art for your living space. Large-scale art is often expensive but it can really make a good impact–I think I have achieved that here! You could even use a tablecloth or textile found at a thrift store, or pick of fabric at the local JoAnn’s. I can picture an awesome ikat fabric, or suzani, or otomi… it seems like geometric or “native” types of print work really, really well with this kind of project.

I like this particular fabric because it has an ikat motif (gray) a sakura motif (green) and a moroccan/arabic star technique (blue)! Of course, I didn’t know what the terms for these designs really were when I bought the fabric… you don’t have to like something just because it’s trendy–just pick something you are drawn to! It’s what I do and it seems to work out well.

Wall Hangings

Want to create your own wall hangings? Grab some stretcher bars or any old wooden frame and stretch your favorite fabric!

I don’t have a step-by-step DIY tutorial for you, but maybe watching this guy will help.